KEDkrafty Finished Objects

A sister blog for the original KEDkrafty. All the specs for my Finished Objects from January 2006 without all the other chit-chat. Look out for highlights from my knitting archives too.

Sunday, February 08, 2009

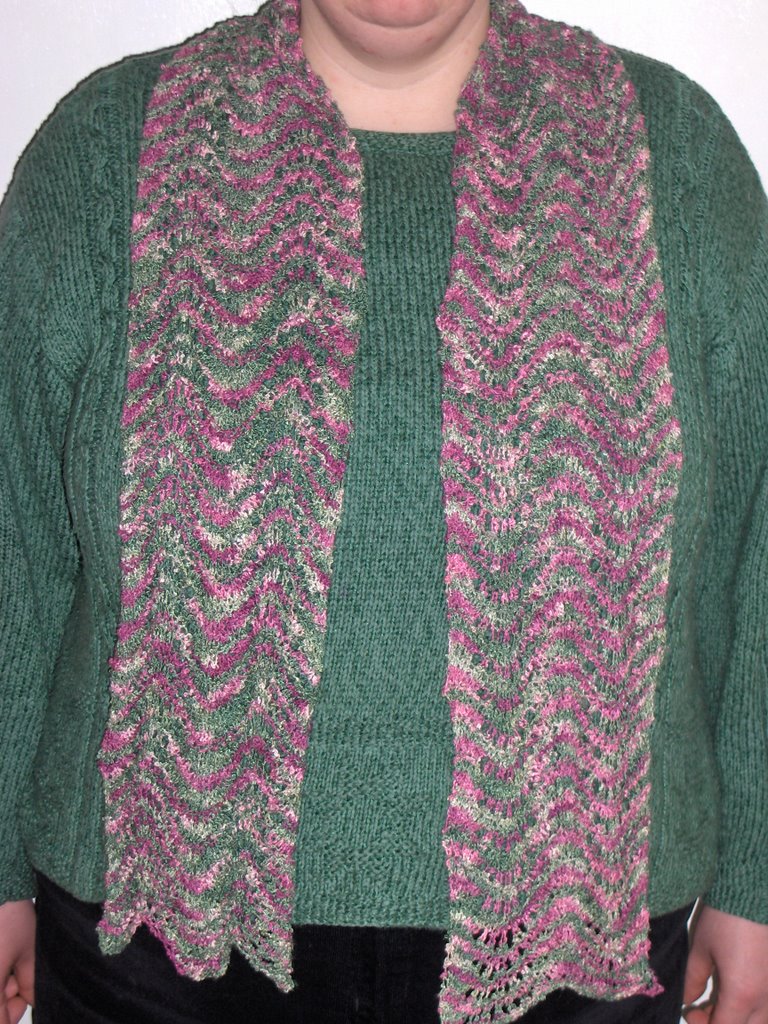
Pattern notes for my Denim Headscarf

As requested, here are the pattern notes for the denim headscarf.
denim headscarf

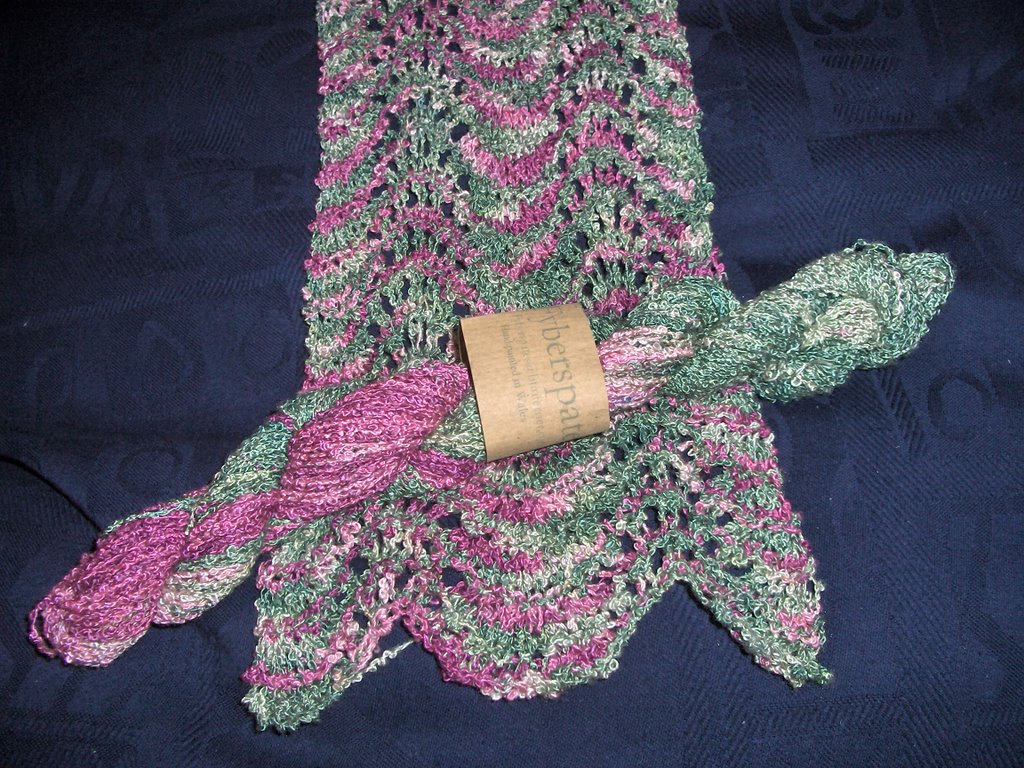
I used a denim yarn which shrinks in the first wash (Sirdar Indigo) but you could easily use a standard, non shrinking yarn.
You could use any yarn weight desired, with the appropriate needles. I used 4mm needles with my DK yarn. It is listed that I needed two balls of yarn, this is true but if I had been doing the edging in the same colour as the main headscarf I would've got away with one.

Firstly, decide if you are going to put on an edging. If you are not doing an edging, you would be advised to keep the edge three stitches on each side in garter stitch, to slightly tame the curling. If you are doing an edging you could proceed as I did.

Cast on three stitches.
1: k1 yo k1 yo k1
2: purl across
3: k2 yo k1 yo k2
4: purl across

Mark off your centre stitch in some way. I used one of the little padlock-style markers but you could just as easily just use a short length of contrasting yarn slipped through the eyelet holes. Move the marker up every few rows.

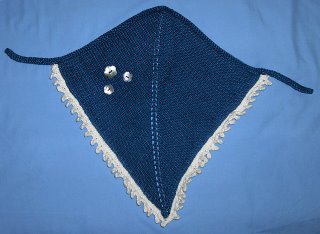
Proceed as set, knitting to the centre stitch yo k centre stitch yo knit across on right side rows and purling back on wrong side rows. You will soon find your work forming into a kite shape.

If you are doing the edging you may wish to consider slipping every first stitch because later some stitches will be picked up and knitted. I didn't though.

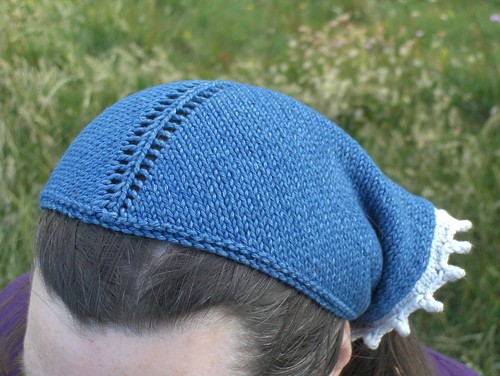
Try the headscarf on and when the ends are about three inches shy of meeting under your head you can start making the ties. This is a matter of taste. You can start the ties sooner for less coverage but I wouldn't start them much later than this or it may cause too much bulk under the head. I stopped increasing when I had 83 stitches, but don't forget I was using a yarn designed to shrink, and I have a large head.

With the right side facing cast on some stitches at the beginning of the next row. In my yarn I cast on about 25sts to make the ties. Knit across your new stitches and the headscarf top.With the wrong side facing cast on some stitches at the beginning of the next row. KNIT across your new stitches, the headscarf top and the other new stitches. Knit one row. Cast off knitwise.

Using your edging yarn and a circular needle or some dpns, pick up and knit 3 stitches for every four rows along the two long diagonal sides. Be generous when picking up the stitches at the pointed tip. Work back and forth in stocking stitch until four rows total have been done on the diagonal edges. As you get to each edge work the edge stitch together with the tie stitch to join the pieces together.

With the right side facing begin the picot cast off. Cast off four stitches. Cast on two then immediately cast them off again, making a little peak. Continue in this way making sure a little peak coincides with the pointed tip of the main scarf. You may have to fudge the numbers a little to make this happen.

Because my yarn required a hot machine wash to set off its shrinking process I did not weave in the ends or sew on the decorative mother-of-pearl buttons until after washing and blocking. If you are hand-washing a non-shrink yarn you can decide if and when to add buttons and weave in ends.
Denim headscarf on

Sunday, October 28, 2007

Gypsy bag, detailed specs


The recipe I used for my Gypsy bag.

I used varying amounts of eight shades of Rowan Kid Classic. I can’t give exact amounts because I was stash-busting balls which were already started. (I had done a small fair-isle border on a cardigan.) A full ball of Kid Classic is 140m, and I would gesstimateu I used about 100m from each ball although I was amazed to see how some colours went further than others! I used 4 ½ mm needles, which is ½ mm down on the recommended size for Kid Classic. I wanted the fabric to be dense and sturdy.

Most unusually for me, I did a couple of swatches, including the button-hole bits to see if the fabric would felt. I was happy enough with the felting and the look of the swatch to proceed. I scribbled down the stitch counts and dimensions of the before and after swatches. I was also happy with the subtle change in colour.

I played with the colour sequence for a while before deciding on what I thought would be a good combination. I used my swatch to work out my cast on number, taking into account the amount of shrinkage I had seen in the swatches.

I cast on 74 sts on 4 ½ mm circs. (If I had been at home I might have provisionally cast them on, because they were intended to be picked up shortly afterwards.) I used a dark grey colour which I thought would be practical for the base.
I went back and forth R/S sl1 k1 across, W/S purl, for 28 rows.
After that I picked up 14 sts across the edge, 74 sts on the initial long side and 14 sts along the edge. I placed markers at all four corners.

I started working in the round in my 2nd colour, k every round. (I found I had to go down to a shorter length circ than I had anticipated to make it less hard work at this stage.)

On row 10 I started the button-holes. I knitted the short edge as usual, I knitted 10 on the long side, I cast off ten, I turned my work and cast on 11, I turned it back and knitted the extra cast on stitch together with the 1st stitch on the right hand needle. I continued knitting (starting with my newly cast on stitches) until there were 20sts left on the long edge. I made a button-hole in the same manner, then knit 10, knit across the 14 edge sts.

I did button-holes on every 10th row.
Each colour I used had two button-hole rows.

If I thought it was looking at all gappy near the button-holes I worked 2 tog.
I kept an eye on the stitch count, and did m1 as necessary if I had been over-zealous in decreasing to avoid gaps.

I changed colour every 20 rows, one row after the button-hole. (I used 5 colours for the main portion.)
When changing colours I did the first 14st edge with both colours held together. I knew from the swatch this would be unobtrusive when felted. I wove in the long tails into the back of the stitches as I went, and left inch long tails to deal with later.

When I had finished my last main colour I left the yarn on the circs and did an applied 3 st I-cord, working the last of the three stitches on my dpn with the next bag stitch on the circ. When I had used up all the bag sts, I did a couple of extra I-cord rows just so I could sew things down later.

On each of the four corners I folded the fabric with the right side (outside) of the bag facing me, and did a running stitch making two edge stitches protrude to give some structure to each corner.

Using 4mm needles I cast on 12sts using my last colour. I did sl1 k1 on the right side and purl across the wrong side. I have learned in the past couple of days how to knit backwards across a short row- it could’ve been useful for this!

I knitted the entire new 140m ball up on this. It was a big temptation to stop sooner, but because of the fact it is just one long strap, you have to be very generous.

I threaded the strap through the button-holes, making sure the strap was on the outside on the bottom. I sewed the ends of the strap together, and marvelled at my new bag. I worked the join round to an unobtrusive place.

I have a setting on my front loading washing machine which is called a Daily Wash. It runs for 29 mins and washes at 40 degrees. I adjusted my spin speed to the lowest possible setting. I washed the bag with a denim skirt and a little soap powder. I was happy at how things were shaping up after one cycle, but felt it wasn’t quite there yet, so put it in again. I didn’t bother with detergent that time. I was pleased with the result and looked around for a suitable cuboid to put into the bag to give it shape while drying. I used a computer accessory box in the end. The colour loss was minimal, as it had been on the swatch.

It had gone from 12” x 12” to 11” across, 10” high.
While the bag was still damp, I flattened out the strap a bit where it weaves in and out of the button-holes. I left the hand straps to roll. I teased the button-holes a little too to give a nice shape.

The short tails from the yarn changes had felted, and I knew the joins were secure, so I cut the tails.

When it was dry I took some plastic canvas for cross stitching and cut it to the shape of the bottom of the bag. I sewed it into place (on the inside obviously) with embroidery floss. I tried it with the Kid Classic yarn but the constant stitching in and out of the plastic weakened it too much.

I sewed the straps into place in a few strategic locations to save it from drifting, and to avoid excessive curling.
Then I sat down and wrote a very long-winded, but comprehensive, account of how I made Gypsy bag. xxx K

Saturday, June 02, 2007

Flickr

This is a test post from flickr, a fancy photo sharing thing.

Monday, March 05, 2007

Archive Five- Thatched Cottages

Added later:
Trust me, I did post this in the correct sequence as an Archive Five, but because I saved a draft of the mitts post, it published it first. Granted, I'm no maths whizz, but I can count to five. x K


I have decided (just cos I can) that some Archive Five posts will be to show you hand-crafted gifts I have received as well as items I've made.


This is a gift from my mother-in-law who occasionally turns her hand to cross stitch.

DH and I had bought her the kit for this one time we had been at the SECC Creative Stitches Fair (she said, "anything except birds,") and then many months down the line she returned the compliment by offering us the finished article as a present. It's up on the wall in the computer room.

No, it's not "the cottage" we visit -if only! And yes, she did stitch all the white work on the cottage walls. I'd have been tempted to let the white fabric shine through, but then again, I am a slovenly girl. :-)

Labels: , ,

Child Welfare Mitts


Name: Child Welfare Mitts
Designer: Katharine @ K1 Yarns
Pattern: Was available online at K1 Yarns at the time
Yarn: Kid Classic
Manufacturer: Rowan
Purchased: English Yarns
Needles: 5mm dpns
Techniques: Had never tried fingerless mittens before. Like a mini sock really.
Stash or Fresh: Stash
For: Charity, can't remember if the proceeds of the sale of these went to the RSSPCC or to Childline
Started: September 2006
Completed: October 2006
Observations: I enjoyed making these and went on to make myself another pair. It turns out that Mhairi, a friend from my knitting group ended up buying these mittens.

Labels: , , ,

Sunday, March 04, 2007

Kiri Shawl


Name:Kiri
Designer:Polly at All Tangled Up This is Polly's version of Sharon Miller's Birch shawl, featured by Rowan. Although Birch starts at 299 sts and works its way down.
Pattern:Kiri Shawl
Yarn: St. Magnus DK , shade 20, Magenta, 2 balls, 50% angora 50% lambswool
Manufacturer: Orkney Angora
Purchased: K1 yarns
Needles: 5mm circulars
Techniques: No new techniques, but a very enjoyable knit.
Stash or Fresh: One ball stash, one ball fresh
For:Self
Started: August 2006
Completed: September 2006
Observations: To date, this has been my most commented and complimented on knit ever, online and especially in real life. Yarn and pattern in perfect harmony

Labels: , , ,

Saturday, March 03, 2007

Indigo Table Mats

Name:Table Mats
Designer: Came to my attention via Mason-Dixon Knitting although I think it is given as a free pattern on the ballband of Peaches'n'Cream yarn
Pattern: Ballband dishcloth
Yarn:Sirdar Indigo
Manufacturer: Sirdar
Purchased: The Black Sheep at the SECC Creative Stitches show
Needles: 4mm bamboo
Techniques: Had never tried this slip stitch pattern before. Very effective.
Stash or Fresh: Fairly fresh
For: Carol, Rowan International Exchange
Started: August 2006
Completed: August 2006
Observations: These were a quick "fall-back" after the item that I intended making for the "Home and Hearth" exchange went pear-shaped, or was it diamond-shaped?

Labels: , , ,

Kiri Headscarf

Name:Kiri Headscarf
Designer:Polly at All Tangled Up
Pattern:Kiri Shawl
Yarn:4ply cotton Colour "Bleached"
Manufacturer: Rowan
Purchased: John Lewis Glasgow
Needles: 3mm Addi Turbos
Techniques: Swatching for a full Kiri shawl.
Stash or Fresh:Stash
For:Self
Started: August 2006
Completed: August 2006
Observations: Loved the crispness of the lacy pattern in the cotton yarn. This is a great scarf for keeping off the midges when walking on Mull or in Dumfries and Galloway. I am very grateful to Polly for making this pattern available, and would recommend it to anyone who fancies a "start small, get big" triangular pattern.

Labels: , , ,

Baby cardigan

Name:Baby cardigan
Designer: Hayfield (Pretty Whites Babykin) , discontinued, but crops up on ebay
Pattern:Pattern 1988 or year 1988? I picked it up in a charity shop.
Yarn: Baby Merino 4ply, shade Buttermilk, 2 balls.
Manufacturer: Jaeger
Purchased: John Lewis Glasgow
Needles: Bamboo 2.75mm and 3.25mm
Techniques: Plenty of practice fitting a raglan sleeve now.
Stash or Fresh:Stash
For:A baby born to one of the girls who attends the same Knitting Group I do.
Started: July 2006
Completed: July 2006
Observations: Never under-estimate how long it will take to sew together and weave in the ends of a tiny garment!

Labels: , , ,

Archive Five - Biggy Print Scarf

This is a moss stitch scarf with a knitted loop to keep it together. It is made from Rowan Biggy Print in what could be the Fiesta colourway.
A very cosy scarf which keeps your neck lovely and warm, but which sheds fibres like there's no tomorrow.
I usually wear this outside a jacket for a tinge of colour.
There's only something like 30m per ball on this yarn, so the scarf loop means you don't have to toss it over your shoulder or double it up to keep it in place, which reduced both cost and bulk.
I bought the yarn for this in John Lewis

Labels: , , ,

Shetland Triangle


Name: Shetland Triangle Shawl
Designer: Evelyn A. Clark, Fibertrends
Pattern: Shetland Triangle, Wrap Style
Yarn: 3 skeins Venezia COLOR Shade 0150, mohair blend
Manufacturer:Lang yarns
Purchased:Citywolle, Vienna
Needles: Can't remember
Techniques: No new techniques.
Stash or Fresh: Fairly fresh
For: Self
Started: June 2006
Completed: July 2006
Observations:Although I think it's really pretty, I have never had as much wear from this shawl as I would have liked. I think this is because it was never quite as big as I wanted it to be, and the percentage synthetic content of the yarn meant I could never block it out beyond certain dimensions. It's more of a shoulder shawl really. I am a member of the Wrap Style Knitalong Blog


Labels: , ,

Monday, November 27, 2006

Leaf Lace Shawl


Name: Leaf Lace Shawl
Designer: The genius who is Evelyn A. Clark at Fibertrends
Pattern:Leaf Lace Shawl
Yarn: 4 x Kid Classic shade Royal #835
Manufacturer:Rowan
Purchased: English Yarns
Needles: Metal 5.5mm circular
Techniques: Never done neck down shawl before. New method of beading the edges.
Stash or Fresh:Stash
For: Self
Started: May 2006
Completed: May 2006
Observations: I loved this pattern from start to finish and learned so much while knitting it. I would definitely use Kid Classic for a substantial shawl again, although now I am trying to branch out into proper laceweight.

Labels: , , , , ,

 
Web Counter
Free Counters